Table of Contents
- Why Reproducibility in Peptide Studies Matters
- Peptide Purity and Identity Verification
- Peptide Research Experimental Design
- Peptide Stability Testing Protocols
- Sample Handling and Contamination Prevention
- Peptide Experiment Documentation Template
- Standardizing Peptide Preparation and Dosing
- Statistical Planning and Interlaboratory Validation
- Frequently Asked Questions
Last Updated: October 9, 2026
Why Reproducibility in Peptide Studies Matters
Reproducibility in peptide studies is the foundation of reliable research. When your results can be replicated by other researchers using the same methods and materials, your findings gain credibility and contribute meaningfully to the scientific community. Without it, even well-designed experiments become isolated data points that others cannot build upon.
The stakes are high. A study that cannot be reproduced wastes time, resources, and funding. It can also mislead downstream research if other teams unknowingly base their work on flawed findings.
Here’s what most guides miss: reproducibility isn’t just about following a protocol. It’s about controlling every variable that could affect your peptide’s behavior. That includes where your peptide came from, how pure it actually is, how it was stored, how you prepared it, and how you documented everything along the way.
The good news is that ensuring reproducibility in peptide studies is entirely within your control. You need to make deliberate choices at each stage, from selecting your peptide supplier to storing your samples to reporting your methods transparently.
Peptide Purity and Identity Verification
Your peptide’s purity directly determines whether your results are reproducible. If your peptide contains impurities or degradation products, those contaminants will behave unpredictably across experiments. Different batches with different impurity profiles will yield different outcomes, even if everything else stays constant.
Peptide identity verification means confirming that the peptide you received is actually the sequence you ordered. Mass spectrometry and high-performance liquid chromatography (HPLC) are the standard analytical methods for this verification. A Certificate of Analysis (COA) from an independent third-party laboratory provides the proof you need.
Never assume purity based on the supplier’s word alone. Demand analytical data.
Reading and Interpreting Certificates of Analysis
A Certificate of Analysis tells you the actual composition of your peptide batch. It should include:
- Peptide sequence and molecular weight, confirms the identity
- Purity percentage, typically expressed as % by HPLC or mass spectrometry
- Impurity identification, lists what the non-peptide material is
- Batch number and lot, links the analysis to your specific vial
- Testing date, tells you how old the analysis is
- Analytical methods used, HPLC, mass spectrometry, or both
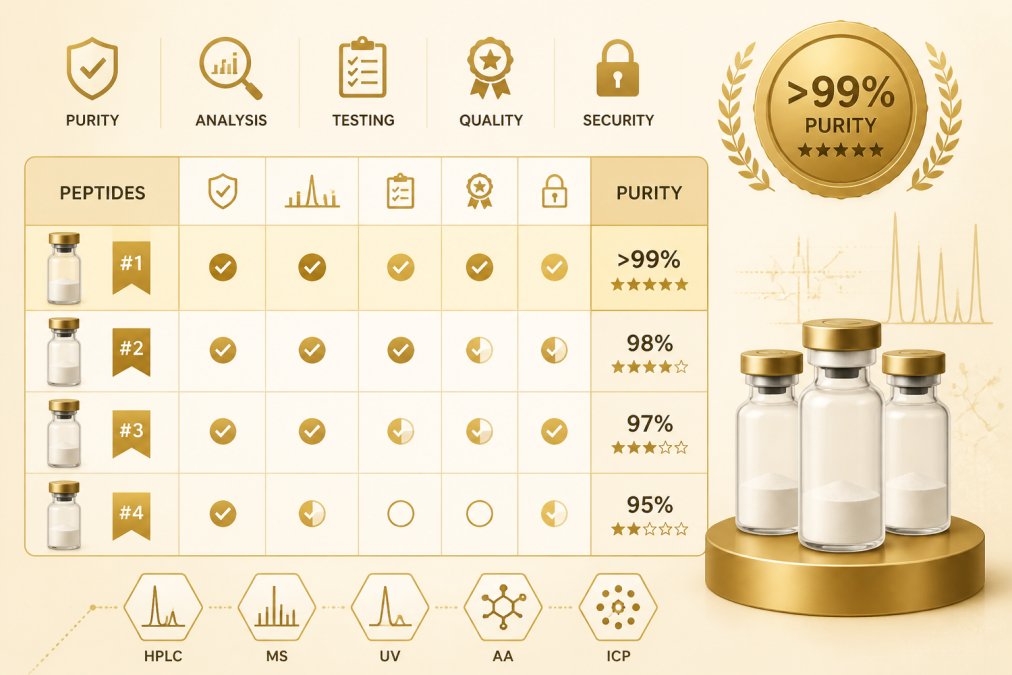
Look for a purity threshold that matches your research needs. Many studies require peptides exceeding 95% purity. Some require 99% or higher. The COA should state the exact percentage for your batch, not a range or estimate.
Red flags to watch for:
- Missing batch number or lot information
- No analytical method specified
- Purity listed as “approximately” or a range
- Testing date older than six months
- No identification of impurities
A good COA is specific, recent, and traceable. PepAlphatides provides individual Certificates of Analysis for every product, with secure QR codes on vials so you can verify the data matches your physical sample.
Batch Documentation and Lot-to-Lot Variability
Even peptides from the same supplier will show lot-to-lot variability. Synthesis conditions, raw materials, and purification runs are never identical. This variability is normal, but you must account for it in your experimental design.
Batch documentation creates the record you need to explain differences between experiments. It includes:
- Batch number and synthesis date
- Purity percentage for that specific batch
- Impurity profile
- Storage conditions recommended by the manufacturer
- Expiration or stability window
When you run multiple experiments, always note which batch you used. If results diverge between experiments, the batch information helps you determine whether the difference came from your technique or from material variation.
This practice prevents a common mistake: assuming your protocol is flawed when the real problem is that you switched to a new batch with slightly different properties. Document your batch. Track your results by batch. Compare apples to apples.
Peptide Research Experimental Design
A solid experimental design is your insurance policy against irreproducible results. It forces you to think through every variable before you start, not after results surprise you.
Biological and Technical Replicates
Biological replicates are independent experiments using the same peptide batch and protocol but different biological samples or cells. They test whether your findings hold across natural variation. If you’re studying peptide effects on cell growth, each biological replicate uses cells from a different culture or passage.
Technical replicates are repeated measurements of the same sample within a single experiment. They measure instrument precision and handling consistency. If you’re running an HPLC analysis, technical replicates are multiple injections of the same solution.
Both types matter for reproducibility:
- Run at least 3 biological replicates per condition
- Include at least 2 technical replicates per sample
- Document which is which in your methods section
- Report both individual values and summary statistics
A common mistake is confusing technical replicates with true replication. Running the same sample three times does not prove your method works across different conditions, it only proves your instrument is consistent.
Controls and Reference Materials
Positive controls are samples known to produce a specific result. They confirm your assay is working. Negative controls are samples expected to show no effect. They rule out false positives.
Reference materials are standard peptides or solutions with known properties. They anchor your measurements to an absolute scale rather than relative comparisons. If you’re measuring peptide concentration, a reference standard of known concentration lets you calibrate your instrument.
Include controls in every experiment:
- Positive control: a peptide or condition known to work
- Negative control: a blank or inactive sample
- Reference material: a standard of known composition
- Vehicle control: the solvent alone, if you dissolve your peptide in a carrier
Controls consume resources but save time by catching problems early. If your positive control fails, you know the assay itself is broken, not your test peptide.
Peptide Stability Testing Protocols
Peptides degrade over time. Heat, light, moisture, and freeze-thaw cycles all accelerate degradation. Understanding your peptide’s stability window is essential for reproducibility because a degraded peptide behaves differently than a fresh one.
Storage Conditions and Temperature Control
Temperature is the biggest factor in peptide stability. Most peptides are most stable at -20°C or -80°C. Room temperature storage dramatically shortens shelf life.
Store your peptides at the temperature recommended on the COA:
- -80°C: Longest stability, often 2+ years
- -20°C: Moderate stability, typically 6-12 months
- 4°C: Short stability, usually weeks to a few months
- Room temperature: Days to weeks at best
Keep peptides in airtight, opaque containers. Light exposure degrades many peptides. Use amber or dark vials if available. Minimize exposure to air and moisture by opening vials only when necessary.
Temperature fluctuations are as damaging as absolute temperature. A freezer that cycles between -15°C and -25°C causes more degradation than constant -20°C storage. Invest in a dedicated peptide freezer with minimal temperature swing.
Document storage temperature and conditions in your lab notebook. If you move a peptide between freezers or store it temporarily at a different temperature, record that. When you later compare results across experiments, you’ll know whether storage conditions changed.
Reconstitution and Solvent Selection
How you dissolve your peptide matters enormously. The solvent you choose affects peptide stability, solubility, and behavior in your assay.
Common solvents for peptide reconstitution:
- Ultrapure water: Suitable for hydrophilic peptides; risk of bacterial growth if not sterile
- Phosphate-buffered saline (PBS): Physiological pH; good for cell-based assays
- Acetic acid solutions: Helps solubility of hydrophobic peptides; acidic environment improves stability
- DMSO: Penetrates cells; use sparingly due to toxicity
Before reconstituting, plan your solvent. Use ultrapure, sterile water or a sterile buffer. Avoid tap water and non-sterile containers. A contaminated solvent will introduce variability that you cannot control.
Reconstitute only the amount you plan to use within a few days. A reconstituted peptide solution degrades faster than lyophilized powder. If you must store reconstituted peptide, keep it at -20°C or -80°C in small aliquots. Never store at room temperature.
Document your reconstitution method:
- Date and time
- Solvent used (brand, lot number if available)
- Target concentration
- Actual volume added
- Any observations (color, clarity, odor)
This record becomes part of your experimental documentation and helps you troubleshoot if results drift.
Sample Handling and Contamination Prevention
Contamination ruins reproducibility. A single bacteria cell, dust particle, or chemical residue can skew your results. Prevention is far easier than correction.
Establish clean handling practices before you begin:
- Use sterile pipette tips for every transfer
- Wear gloves and change them frequently
- Clean your work surface with 70% ethanol before starting
- Use sterile, endotoxin-free tubes and containers
- Never touch the inside of caps or tube openings
- Keep peptide solutions covered when not actively pipetting
Freeze-thaw cycles degrade peptides and increase contamination risk. Minimize them by aliquoting your reconstituted peptide into small portions immediately after reconstitution. Use one aliquot per experiment. Discard the aliquot after use rather than refreezing.
Label everything clearly with:
- Peptide name and sequence
- Batch or lot number
- Reconstitution date
- Concentration
- Storage temperature
- Expiration date
Clear labeling prevents mix-ups and helps you track which samples have been used or compromised.
Peptide Experiment Documentation Template
Documentation is where reproducibility lives. If you cannot describe exactly what you did, no one else can repeat it. Most guides stop at “keep good notes.” A peptide-specific template is more useful because it forces you to capture the variables that actually change peptide behavior: sequence, modifications, lot, purity method, solvent, concentration, storage, and handling history.
Essential Information for Reproducibility
Create a standardized template and use it for every experiment. The fields below are peptide-specific and map to the content gaps most general guides miss.
| Information | Purpose | Acceptance Criteria |
|---|---|---|
| Peptide name and full sequence | Confirms identity | Matches ordered sequence, including modifications |
| Modifications (acetylation, amidation, phosphorylation, disulfide bonds, D-amino acids) | Explains behavior differences | Listed explicitly, not implied |
| Batch number and lot | Links experiment to specific material | Matches COA and vial label |
| Purity percentage and method | Confirms material quality | HPLC purity ≥ 95% for most assays; ≥ 98% for quantitative work |
| Impurity profile | Flags interfering species | No unidentified peak above 1% area |
| Counterion and salt form (TFA, acetate, HCl) | Affects solubility and assay response | Recorded; consistent across compared batches |
| Storage conditions before use | Tracks degradation risk | Matches manufacturer recommendation |
| Reconstitution date, solvent, and lot | Documents preparation | Recorded before use |
| Target and measured concentration | Enables dose-response analysis | Measured value within ±10% of target, or discrepancy noted |
| Freeze-thaw cycle count | Tracks degradation | Minimized; documented per aliquot |
| Analytical method and instrument model | Enables replication | Specified with settings |
| Positive and negative controls | Validates assay | Both included, results recorded |
| Biological and technical replicates | Measures reproducibility | Minimum 3 biological, 2 technical |
| Raw data files | Supports transparency | Saved with experiment date in nonproprietary format |
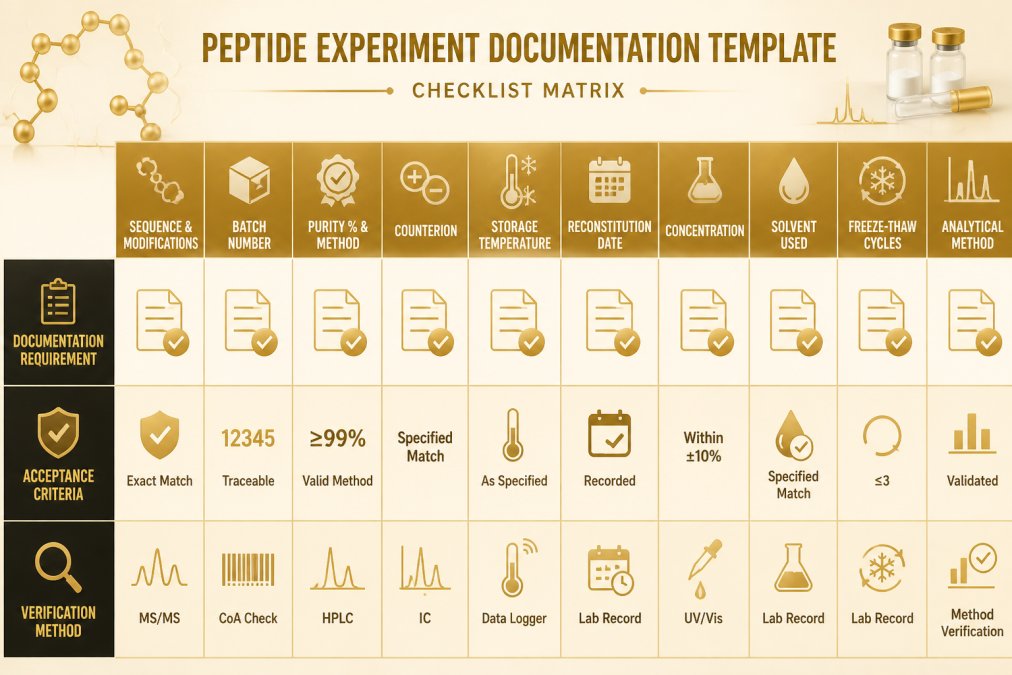
Treat the acceptance criteria column as a gate, not a suggestion. If a batch fails a criterion, for example, purity below your threshold or an unidentified impurity peak, document the deviation and either reject the batch or explain in your methods why you proceeded.
A Reusable Reporting Checklist
A template is only reproducible if someone else can audit it. Before you consider an experiment complete, confirm each item below is recorded in a form a reader could follow without contacting you:
- Sequence and all modifications, written in standard one-letter or three-letter code
- Supplier, catalog number, lot, and synthesis date
- Purity value, method, and the instrument or service that produced it
- Counterion and salt form
- Lyophilized or reconstituted state at time of use
- Solvent identity, grade, and lot
- Final concentration and how it was verified
- Storage temperature and duration before use
- Number of freeze-thaw cycles per aliquot
- Assay buffer, pH, and temperature
- Replicate structure (which samples were biological vs. technical)
- Controls used and their outcomes
- Statistical test, sample size, and exclusion criteria
- Raw data location and file format
This checklist is the difference between a methods section someone can repeat and one they can only approximate.
Data Transparency and Raw Data Reporting
Reproducibility requires transparency. Report your methods and data in enough detail that a skilled researcher can follow your steps.
In your methods section, include:
- Peptide source, sequence, modifications, batch number, and purity with method
- Counterion and salt form
- Exact storage conditions and time in storage
- Reconstitution protocol with solvent, lot, and measured concentration
- Incubation times and temperatures
- Analytical methods with instrument models and settings
- Statistical tests used, with sample-size rationale
In your results, include:
- Individual data points, not just means
- Standard deviations or confidence intervals
- Sample sizes (n values) for each group
- Any data points excluded and why
- Raw data files if possible
Share your raw data. Depositing raw data in a public repository or supplementary materials allows others to verify your analysis and reanalyze if needed. Save chromatograms, mass spectra, and plate-reader exports in nonproprietary formats such as CSV or open XML rather than only in instrument-native files. Include a version history so readers can tell which protocol revision produced which dataset.
Many journals now require data availability statements. Plan for this from the start. Document your analysis steps. Make your work auditable.
Standardizing Peptide Preparation and Dosing
Inconsistent preparation and dosing is a hidden source of irreproducible results. Small variations in how you reconstitute or measure peptide can compound across experiments.
Create a standard operating procedure (SOP) for peptide preparation:
- Exact steps in order
- Specific equipment and settings
- Timing and temperatures
- Quality checks at each stage
Use this SOP every time. Do not deviate. If you discover a better method, update the SOP and document the change. Use the new method going forward, and note in your results which experiments used which version.
For dosing, measure concentration independently rather than trusting the reconstitution calculation. Use HPLC, UV absorbance at 280 nm, or another quantitative method. This catches errors in weighing or volume measurement.
Document your actual measured concentration in your lab notebook. If it differs from your target, note the discrepancy. Use the measured concentration in your analysis, not the intended one.
Statistical Planning and Interlaboratory Validation
Statistics matter for reproducibility. Poor statistical design can make irreproducible results look significant, and a protocol that only works in one lab is not truly reproducible. This section covers both: planning the analysis before you run it, and testing whether your protocol transfers to another laboratory.
Sample-Size Rationale and Power
Plan your sample size before you start. Determine how many replicates you need to detect the effect size you expect. Underpowered studies, those with too few replicates, are prone to false positives and irreproducible findings.
A practical approach:
- State the smallest effect size that would be scientifically meaningful for your peptide.
- Estimate variability from a pilot run or from published work on similar peptides.
- Choose a significance threshold (typically α = 0.05) and a target power (commonly 0.80).
- Use a power calculator or statistical software to derive the required n per group.
- Round up, and add a margin for anticipated loss of samples.
If you cannot justify a sample size, say so explicitly and treat the result as exploratory rather than confirmatory. Reviewers and readers can then weigh the finding accordingly.
Pre-Specified Analysis and Exclusion Criteria
Use a priori statistical testing. Decide your primary outcome and statistical test before you run the experiment. Avoid p-hacking or multiple comparisons without correction. These practices inflate false positive rates and destroy reproducibility.
Define exclusion criteria in advance. Common peptide-specific reasons to exclude a data point include:
- A failed positive control in that run
- A purity or concentration measurement outside your acceptance range
- Visible precipitation or turbidity in a reconstituted aliquot
- A freeze-thaw count exceeding your documented limit
- An instrument calibration failure
Record every exclusion and the reason. Excluding points after seeing results, without a pre-specified rule, is a reproducibility failure even when the intent is innocent.
Document your statistical approach:
- Hypothesis tested
- Primary outcome measure
- Sample size calculation and inputs
- Statistical test chosen
- Significance threshold (typically α = 0.05)
- Any corrections for multiple comparisons
- Exclusion criteria and any points excluded
Reporting only means and p-values hides the variability that matters most for peptides. Report individual values, dispersion measures, and the exact n for each group so a reader can recompute your analysis.
Interlaboratory and Round-Robin Validation
Consider interlaboratory validation if your findings are important. Share your protocol with another lab and ask them to replicate your results using their own materials and equipment. This is the ultimate test of reproducibility. If an independent lab can reproduce your findings, you have strong evidence your results are real.
A round-robin or transfer study works best when you control the variables that travel poorly:
- Send the same lot of peptide, with its COA, to each participating lab.
- Provide the SOP, including solvent, concentration, and storage instructions.
- Ask each lab to run the assay with its own instrument and reagents.
- Have each lab report raw data, not just summary statistics.
- Compare results against a pre-agreed acceptance window, such as a mean within a stated percentage of the reference lab and overlapping confidence intervals.
If results diverge, the batch record and documentation template from the previous section let you isolate whether the cause was material, handling, or instrument. That diagnosis is the point of the exercise: a protocol that transfers cleanly is one others can build on.
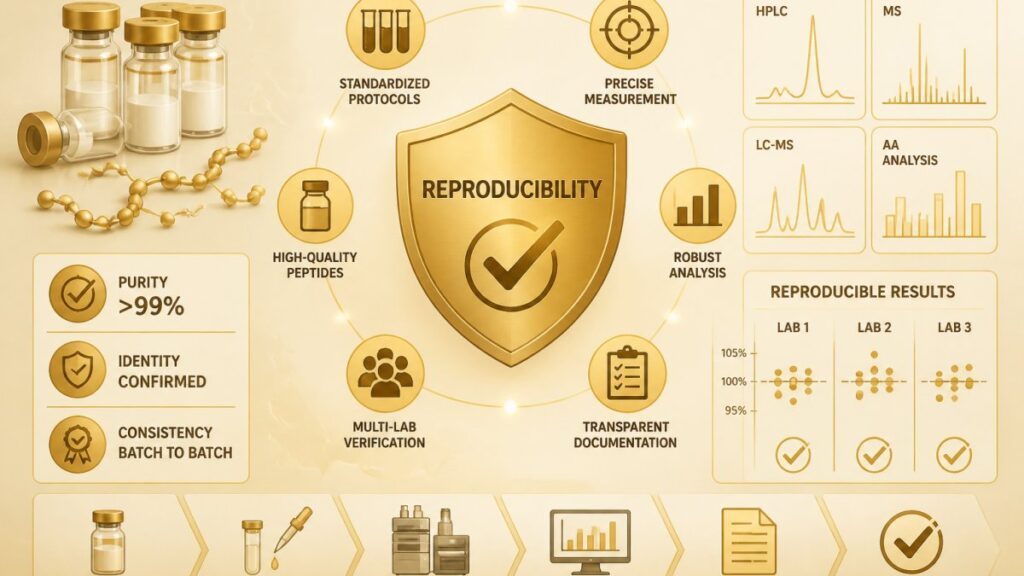
Reproducibility has two layers. Within your lab, it depends on pre-specified statistics, documented exclusions, and controlled material. Across labs, it depends on a protocol and a peptide lot that travel well enough for an independent team to reach the same conclusion.
Frequently Asked Questions
What makes peptide studies difficult to reproduce?
Peptide studies face reproducibility challenges due to lot-to-lot variability in synthesis, sensitivity to storage conditions, and degradation from freeze-thaw cycles or light exposure. Without standardized protocols for reconstitution, concentration verification, and sample handling, results diverge between labs. Missing or incomplete batch documentation prevents researchers from identifying whether differences stem from the peptide itself or experimental variables. Transparent reporting of purity levels, analytical methods, and storage history is essential to isolate true biological effects from material inconsistencies.
How should researchers document peptide identity and purity?
Document peptide identity by recording the batch number, lot number, sequence, and synthesis date from the Certificate of Analysis. Purity documentation must include the analytical method used (typically high-performance liquid chromatography or mass spectrometry), the measured purity percentage, detected impurities, and the testing date. Store these records alongside your experimental protocol and raw data. For reproducibility in peptide studies, reference the specific batch in your methods section and include the full COA data in supplementary materials. This allows other researchers to source identical material or account for known batch differences.
How can peptide storage and handling affect experimental results?
Peptide stability depends on temperature, light exposure, solvent, and freeze-thaw cycles. Storing peptides at -20°C or -80°C slows degradation; room-temperature storage accelerates it. Exposure to light degrades many peptides within days or weeks. Each freeze-thaw cycle introduces stress that fragments peptides and alters concentration. Improper reconstitution solvents or incorrect pH can also trigger aggregation or precipitation. To ensure reproducibility in peptide studies, document exact storage conditions, count freeze-thaw events, and validate concentration before each experiment. Stability testing under your specific conditions reveals degradation rates and informs acceptable storage windows.
How many replicates are needed for a peptide study?
Plan at least three biological replicates (independent samples) and two to three technical replicates (repeated measurements of the same sample) to account for natural variation and measurement error. For dose-response or time-course studies, increase replicates to five or more per condition. Statistical power analysis, based on expected effect size and acceptable error rates, determines the minimum. Document your replication strategy before starting the experiment. Include positive and negative controls in every replicate set. Transparent reporting of actual versus planned replicates demonstrates rigor and helps readers assess whether sample size limitations affected conclusions.