Last Updated: November 1, 2026
Quick Summary
Peptide reconstitution is the process of adding a liquid solvent to lyophilized powder so the peptide dissolves into a usable solution. Add the diluent slowly down the inside of the vial wall, then swirl gently, never shake, and refrigerate the solution at 2-8 °C.
- Swab the stopper with 70% isopropyl alcohol and let it dry fully, usually 30 seconds.
- Concentration is mass divided by volume: 5 mg in 2.5 ml gives 2 mg per ml.
- Bacteriostatic water contains 0.9% benzyl alcohol; sterile water has no preservative.
- Reconstitute once, divide into single-use aliquots, and thaw only what you need.
- Lyophilized powder stores long-term at -20 °C, kept dry and protected from light.
Table of Contents
- What Peptide Reconstitution Is and When You Need It
- Supplies and Clean Workspace Setup Before You Start
- Peptide Solvent Selection: Matching the Diluent to the Compound
- Calculating Solvent Volume and Final Concentration
- Peptide Reconstitution Instructions: Adding Diluent Step by Step
- Mixing and Dissolution: Gentle Swirling, Never Shaking
- Labeling, Aseptic Handling, and Contamination Control
- Reconstituted Peptide Shelf Life and Storage Conditions
- Peptide Freeze-Thaw Cycles: Aliquoting and Temperature Excursions
- Ordering Peptides With the Batch Documentation Your Protocol Requires
- Frequently Asked Questions
What Peptide Reconstitution Is and When You Need It
Peptide reconstitution is the process of adding a liquid solvent to a lyophilized powder so the peptide dissolves into a usable solution. You need it whenever a vial arrives as a freeze-dried cake rather than a liquid. Peptides are commonly supplied as lyophilized powder because dry peptide holds its structure longer than a solution does.
The logic is simple. Powder is stable. Liquid is convenient. Reconstitution is the handoff between the two.
Most guides treat this as a single skill. It’s really two: dissolving the peptide without damaging it, and then keeping that solution intact long enough to be useful. Get the first part right and skip the second, and you’ve wasted a good vial.
Below, we walk through the full workflow, from clean workspace to cold storage, and flag where peptide reconstitution goes wrong.
Supplies and Clean Workspace Setup Before You Start
Before you open a vial, gather everything and clear a surface. A clean workspace is the cheapest insurance in the lab.
Here’s what your bench needs:
- The peptide vial, at room temperature
- Your chosen diluent
- A calibrated syringe or pipette
- Alcohol swabs for the vial stopper
- Labels and a permanent marker
- A sharps container
- Gloves and eye protection
Wipe the surface down first. Then swab the stopper and let it dry fully. A wet stopper lets contaminants ride the needle into the vial. Rite Aid’s reconstitution guide recommends confirming vial strength, diluent, volume, storage temperature, and discard date from the product directions before you begin, and that check takes thirty seconds.
Watch out: skipping the stopper swab is the most common contamination source in small-volume work.
Peptide Solvent Selection: Matching the Diluent to the Compound
There is no universal diluent. The right solvent depends on the peptide’s solubility profile, and guessing wrong means a cloudy vial and a lost batch.
The two main choices:
- Bacteriostatic water contains 0.9% benzyl alcohol as a preservative, which slows microbial growth in multi-use vials. reconstitution water, 3ml
- Sterile water has no preservative. Use it when the peptide is sensitive to benzyl alcohol or when the solution is single-use.
Some peptides need a small amount of dilute acetic acid to go into solution before you add water. Others dissolve cleanly in plain sterile water. Check the product directions every time.
Best for: bacteriostatic water when you’ll draw from the vial more than once. Skip if: your peptide’s directions specify preservative-free diluent.
Calculating Solvent Volume and Final Concentration
Concentration is mass divided by volume. That’s the whole formula. The mistakes happen in the units.
If you have 5 mg of peptide and add 2.5 ml of diluent, your concentration is 2 mg per ml. Add 5 ml instead and it’s 1 mg per ml. The powder didn’t change. The volume did.
Work it out before you inject anything:
- Note the peptide mass on the label in mg
- Decide your target concentration
- Divide mass by concentration to get the volume to add
- Convert to the units on your syringe
Unit slips cause real errors. 1 mg equals 1,000 mcg, and a decimal place in the wrong spot throws off every dose measurement that follows. Peptide Mass Quantity Calculator
Write the final concentration on the label before the needle touches the stopper.
Peptide Reconstitution Instructions: Adding Diluent Step by Step
These peptide reconstitution instructions assume a clean bench and a confirmed diluent. Total time is about five minutes.
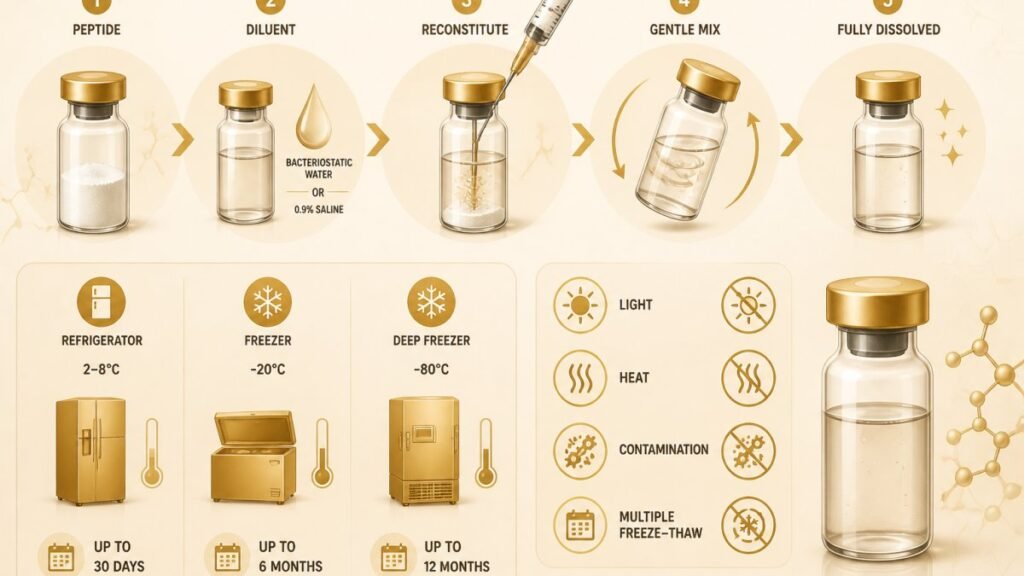
- Draw your calculated volume of diluent into the syringe.
- Insert the needle through the stopper at a slight angle, aiming at the vial wall.
- Release the diluent slowly down the inside of the glass, not onto the powder.
- Withdraw the needle and swab the stopper again.
- Let the vial sit for a minute before you touch it.
The vial wall matters. A direct stream onto lyophilized powder can shear the peptide and create foam that never fully clears. Slow addition down the glass is the single habit that separates a clean solution from a cloudy one.
Don’t shake the vial to speed things up. We’ll cover why next.
Mixing and Dissolution: Gentle Swirling, Never Shaking
Gentle swirling dissolves peptide. Shaking destroys it. That’s the short version.
Swirl the vial in a slow circle between your fingers. The liquid should move, but it shouldn’t froth. Most peptides go into solution within a few minutes this way.
If the powder resists, give it more time before you escalate. A few options:
- Swirl longer and check again
- Roll the vial gently between your palms
- Let it stand at room temperature for several minutes
Vigorous shaking introduces air and mechanical stress. Some peptides aggregate when that happens, and aggregation doesn’t reverse. The solution may look clear while the peptide is no longer what you started with.
What most guides miss: incomplete dissolution is a signal, not an inconvenience. If powder remains after patient swirling, the diluent is probably wrong for that compound. Revisit solvent selection rather than forcing it.
Labeling, Aseptic Handling, and Contamination Control
Label the vial the moment it’s mixed. Unlabeled vials are how experiments get repeated, and a label written from memory a week later is a guess.
Your label should carry:
- Peptide name and lot number
- Final concentration, with units (mg/mL, not just “5”)
- Diluent used, including preservative status
- Date and time of preparation
- Preparer’s initials
- Discard date, if your protocol sets one
Write the concentration before the needle touches the stopper. A label added after the fact invites a transcription error, and a wrong concentration on a correct solution is still a wrong solution.
Where contamination actually comes from
Most small-volume contamination isn’t dramatic. It enters through four routine openings:
- A wet stopper. Swab the stopper with 70% isopropyl alcohol and let it dry fully, usually 30 seconds. Alcohol needs contact time to work; a wet stopper carries surface contaminants down the needle track.
- A reused needle. A needle that has touched a bench, a glove, or a previous vial is no longer sterile. Use a fresh needle for every draw and every vial entry.
- A needle that touches the stopper’s outer rim on the way in. Aim for the center of the stopper and insert at a slight angle so the bevel passes cleanly through.
- A vial left open or a septum punctured too many times. Every puncture enlarges the channel. Multi-use vials tolerate repeated draws better when the stopper is swabbed before each one and the needle is sharp.
A preservative like benzyl alcohol in bacteriostatic water slows microbial growth, it does not sterilize a contaminated vial. Preserved vials still require aseptic technique; they just give a small margin if a stray organism enters.
A practical aseptic checklist
Run this before and after every session:
- Wipe the bench with alcohol and let it dry
- Gloves on; eye protection if splashing is possible
- Swab every stopper before entry and after withdrawal
- Fresh needle for each vial entry; never reinsert a used needle
- Keep the needle tip off the bench, gloves, and vial exterior
- Cap or discard the syringe immediately after use
- Sharps container within reach, not across the room
- Record the draw on the label or log
Contamination in a preserved vial is slow and quiet, a slight haze, a change in color, a faint odor. In a preservative-free vial it can move fast. Either way, a solution that looks different from the day it was mixed should not be used.
Sterile versus clean: know which you need
A clean bench is not a sterile field. If your protocol requires sterility, for example, anything intended for injection, a benchtop wipe-down is not sufficient, and the preparation should be handled under appropriate sterile conditions by qualified personnel. For research use where the solution will not enter a body, clean technique plus single-use supplies is the common baseline. Match the technique to the intended use, and when the intended use is human administration, follow the product labeling and a clinician’s instructions rather than a general tutorial.
Reconstituted Peptide Shelf Life and Storage Conditions
Reconstituted peptide shelf life is shorter than most people expect, and there is no universal number. Any guide that hands you a single figure, 30 days, 90 days, is generalizing past the evidence. Stability in solution depends on at least six variables:
- The peptide itself. Sequence, length, and the presence of oxidation-prone residues like methionine, cysteine, or tryptophan all change how fast a solution degrades.
- The diluent. Preservative-free sterile water offers no antimicrobial protection; bacteriostatic water with 0.9% benzyl alcohol slows microbial growth but can interact with sensitive peptides.
- Concentration. More dilute solutions can lose a larger fraction of active peptide to surface adsorption on the vial wall.
- Container and headspace. Glass versus plastic, and how much air sits above the liquid, affect oxidation and adsorption.
- Handling. Every draw introduces air and a puncture; every warm-up and cool-down is a stress cycle.
- Temperature history. Not just the setpoint, the excursions along the way.
Because those variables compound, treat any published shelf life as a starting point for your own stability check, not a guarantee.
A beyond-use decision framework
Instead of a universal discard date, work from three inputs:
- The manufacturer’s directions. If the product labeling specifies a reconstituted storage temperature and beyond-use date, that overrides general advice. Follow it.
- The preservative status. A preserved multi-use vial is typically handled on a shorter clock than a frozen single-use aliquot, because repeated punctures accumulate risk.
- Your own observation. Document appearance at mixing and at each use. A solution that turns cloudy, changes color, or shows particles has failed regardless of the calendar.
Write a discard date on the label based on the manufacturer’s directions plus your handling pattern, then treat appearance and handling history as vetoes. A date is a ceiling, not a promise.
Storage temperature by state
| Storage State | Temperature | Notes |
|---|---|---|
| Lyophilized powder | -20 °C | Long-term; keep dry and protected from light |
| Reconstituted, short-term | 2-8 °C | Refrigeration; preserved vials only for multi-use |
| Reconstituted, long-term | -20 °C or lower | Compound-dependent; some need -80 °C |
JPT’s storage guidance notes that some reconstituted peptides may need -20 °C or lower, and some may require -80 °C. Other guidance recommends refrigeration at 2-8 °C for post-mixing storage. The honest takeaway: check peptide-specific instructions instead of assuming one temperature fits all.
Keep solutions out of direct sunlight. Protect from moisture. A cool, dark, temperature-controlled spot is the baseline. A frost-free freezer that cycles above -20 °C during defrost is not a stable long-term home for frozen aliquots, a manual-defrost or laboratory freezer holds temperature more consistently.
Temperature excursions: what to do when the cold chain breaks
Excursions are common: a freezer door left open, a power flicker, a shipment delayed in transit. The response depends on the state of the material.
- Lyophilized powder that warmed briefly. Dry powder is the most forgiving state. If it stayed dry and out of direct heat, it is usually still usable; document the event and inspect for clumping or discoloration.
- Frozen aliquot that partially thawed and refroze. Treat the freeze-thaw count as unknown and consider the aliquot compromised. Refreezing a partially thawed aliquot adds a cycle you can’t account for.
- Reconstituted solution left at room temperature for hours. This is the hardest case. The answer depends on the peptide, the diluent, and how long it sat, which is exactly why the conservative default is to start fresh rather than guess.
When storage history is uncertain, do not average the risk. A new aliquot costs less than a ruined experiment or an unreliable result.
Peptide Freeze-Thaw Cycles: Aliquoting and Temperature Excursions
Repeated freeze-thaw cycles degrade peptide, and the damage compounds quietly. Aliquoting is the fix.
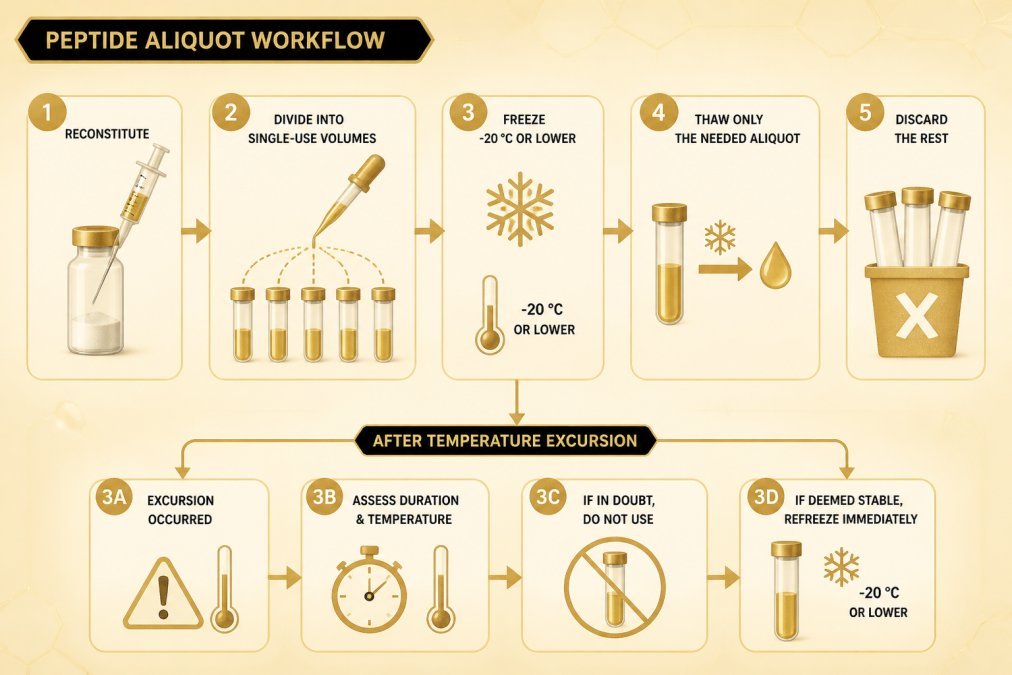
American Peptides’ storage and handling guide recommends reconstituting once, immediately dividing into single-use volumes, freezing the aliquots, and thawing only what you need. Each aliquot gets one thaw. Nothing gets refrozen.
Temperature excursions happen. A freezer door left open, a power flicker, a shipment delayed. If a frozen aliquot warms and refreezes, treat the cycle count as unknown and consider it compromised. A solution that sat at room temperature for hours is a different question, and the answer depends on the peptide.
The rule we’d give anyone: when in doubt, start fresh. A new aliquot costs less than a ruined experiment.
Ordering Peptides With the Batch Documentation Your Protocol Requires
Good technique can’t rescue a bad starting material. If the powder was impure or degraded before it hit your bench, no amount of careful swirling fixes it.
That’s why documentation matters as much as method. Regulatory bodies including the FDA, ICH, and EMA have established guidelines for peptide analysis, stability testing, and quality control, as outlined in a 2025 review of therapeutic peptide regulatory guidelines. Those standards exist because peptide quality is measurable, not a matter of trust.
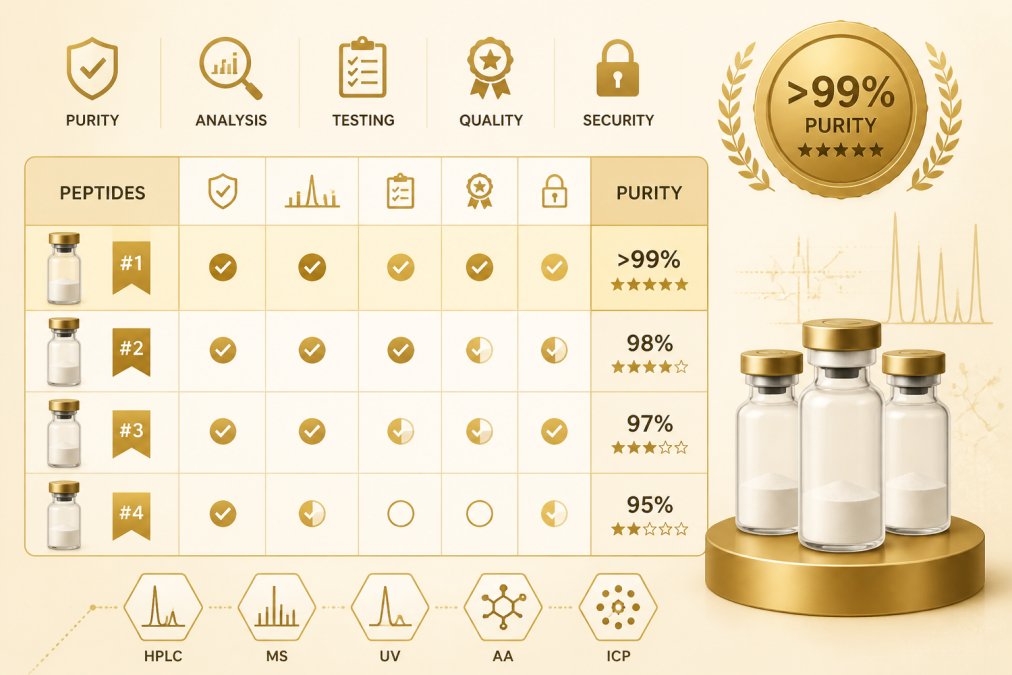
At PepAlphatides, every batch undergoes independent third-party testing to verify purity levels exceeding 99%. Each product includes its own Certificate of Analysis, and secure QR codes on vials provide batch transparency. For current pricing, discounts, and shipping terms, visit the PepAlphatides website.
Frequently Asked Questions
How do you properly reconstitute a research peptide?
Confirm the vial strength, diluent, and volume from the product directions, then work in a clean workspace with sterile technique. Wipe the vial stopper, draw the diluent with a syringe, and add it slowly down the vial wall instead of blasting it onto the lyophilized powder. Swirl gently until the powder dissolves fully. Never shake the vial, because vigorous agitation can damage the peptide. Label the prepared vial with the date and concentration, then store it per the product-specific instructions.
What solvent should be used to reconstitute a peptide?
Peptide solvent selection depends on the compound. Bacteriostatic water is common for multi-use research vials because the preservative slows microbial growth, while sterile water suits work where a preservative is unwanted. Some peptides need dilute acetic acid to dissolve properly. There is no universal diluent, so check the product directions for each vial rather than assuming one solvent works for everything.
How long can reconstituted peptides be stored?
There is no single beyond-use date that applies to every peptide. Stability in solution varies by compound, concentration, and diluent, and published guidance ranges from short-term refrigeration at 2-8 C to frozen storage at -20 C or even -80 C for less stable sequences. Follow the discard date in the product directions, and when in doubt, prepare fresh material rather than extending a solution past its documented window.
Can peptides be frozen after reconstitution, and how do you avoid repeated freeze-thaw cycles?
Many reconstituted peptides can be frozen, but repeated peptide freeze-thaw cycles degrade them. The practical fix is to reconstitute once, immediately aliquot the solution into single-use volumes, freeze the aliquots, and thaw only what you need for one session. Keep the working aliquot refrigerated at 2-8 C, protect it from light, and never refreeze a thawed aliquot.
The gap between a clean experiment and a failed one often comes down to preparation you did before the vial was ever opened. If you want starting material you can actually verify, PepAlphatides gives you batch-level transparency, third-party purity testing above 99%, and QR-coded reports on every vial. Get started with PepAlphatides and begin your next protocol with documentation you can check.