Last Updated: November 9, 2026
Quick Summary
Peptide stability testing is reliable only when protocols are fixed and verified, because a 2024 protocol comparison found published methods differ substantially in incubation, precipitation, and detection steps, limiting direct comparison between studies. Fix temperature, buffer, and quench method in writing, and confirm results with orthogonal analysis rather than a single method.
- Hydrolysis, oxidation, and deamidation are the three degradation routes that cause most peptide failures.
- Reverse-phase HPLC on a C18 column with a water/acetonitrile gradient and 0.1% trifluoroacetic acid is the workhorse stability method.
- Run at least two methods that separate by different principles and report both chromatograms, not just the summary percentage.
- A method with resolution below 1.5 between intact peak and nearest degradation product cannot support a stability claim.
- Run one stress variable at a time, since combining heat and light makes the degradation route unassignable.
Table of Contents
- Why Peptide Stability Testing Protocols Produce Different Results
- Principles of Peptide Stability: What Degrades a Sequence
- Incubation and Precipitation: The Steps That Break Comparability
- Analytical Detection: HPLC, Mass Spectrometry, and Orthogonal Analysis
- How Accelerated Stability Testing Fits Into a Study Design
- Peptide Storage and Handling Guidelines for Reproducible Assays
- Third-Party Analytical Testing Services and What Their Reports Prove
- Troubleshooting Assay Failures and Interpreting the Data
- Sourcing Compounds That Hold Up to Stability Testing
- Frequently Asked Questions
Why Peptide Stability Testing Protocols Produce Different Results
Peptide stability testing for laboratory research is the set of lab procedures that measure how a peptide holds up over time under defined conditions. The trouble is that no single standard governs how those procedures run. A 2024 protocol comparison found that published methods differ substantially in their incubation, precipitation, and detection steps, which limits direct comparison between studies (Comparison of Protocols to Test Peptide Stability in Blood, 2024).
That matters more than most researchers expect. Two labs can test the same sequence and report opposite half-lives, and both can be correct.
Below, we break down where protocols diverge, how to design around it, and how to read a third-party report without overtrusting it.
Principles of Peptide Stability: What Degrades a Sequence
Peptide stability is the ability of a peptide’s chemical structure and molecular weight to stay unchanged under specified storage and assay conditions. Three degradation routes cause most failures, and each responds to different controls.
Hydrolysis, Oxidation, and Deamidation
- Hydrolysis cleaves the peptide backbone, often at Asp-Pro bonds, and speeds up at extreme pH.
- Oxidation attacks methionine, cysteine, and tryptophan residues, driven by oxygen, light, and trace metals.
- Deamidation converts asparagine to aspartate, and the rate climbs with pH and temperature.
A 2021 review describes proteolytic stability assessment as an increasingly important part of peptide characterization (The Challenge of Peptide Proteolytic Stability Studies, 2021). In practice, that means you need to know which route dominates your sequence before you pick a buffer. Our peptide stability indicators research materials cover these mechanisms in more depth.
Incubation and Precipitation: The Steps That Break Comparability
Incubation and precipitation are where most comparability is lost. Incubation sets the temperature, buffer, and time window. Precipitation stops the reaction and removes protein interference before detection. Change either one and your numbers shift.
The 2024 comparison found wide variation across both steps among published protocols (protocol comparison of incubation and precipitation methods). Some methods use ice-cold organic solvent to crash out protein; others use acid precipitation or filtration. Each leaves a different fraction of intact peptide in the supernatant.
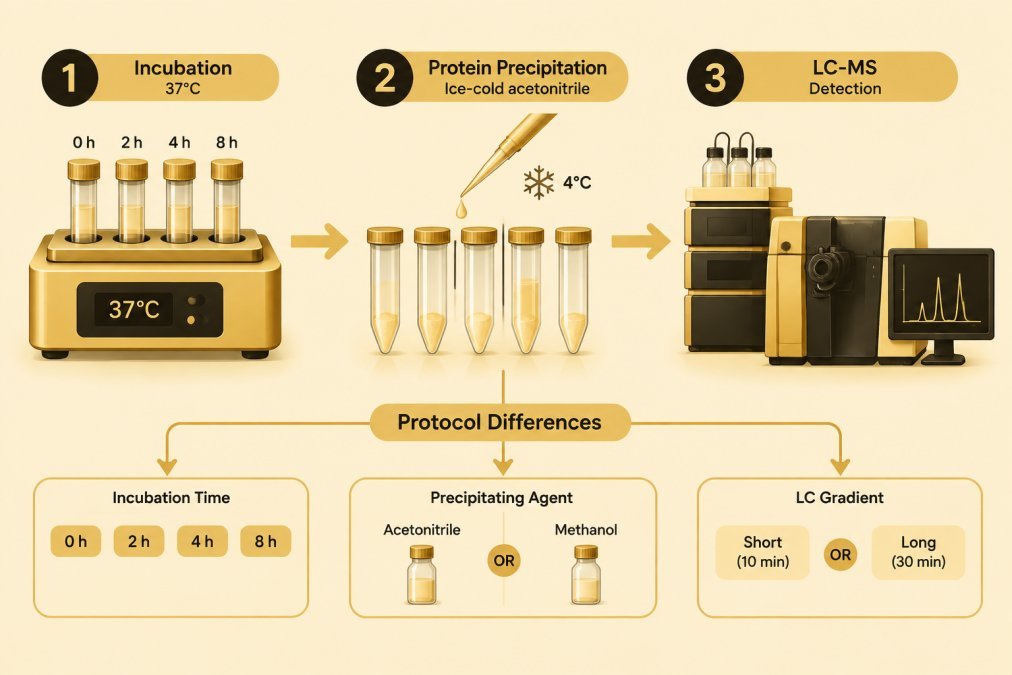
Fix these variables in writing before you run anything. Temperature, buffer molarity, and quench method should be identical across every batch you intend to compare.
Analytical Detection: HPLC, Mass Spectrometry, and Orthogonal Analysis
Detection is the last place comparability breaks, and the fix is redundancy. Orthogonal analysis means running two methods that separate compounds by different principles, so a false result in one gets caught by the other. A single-method stability report is best treated as a starting point, not a conclusion.
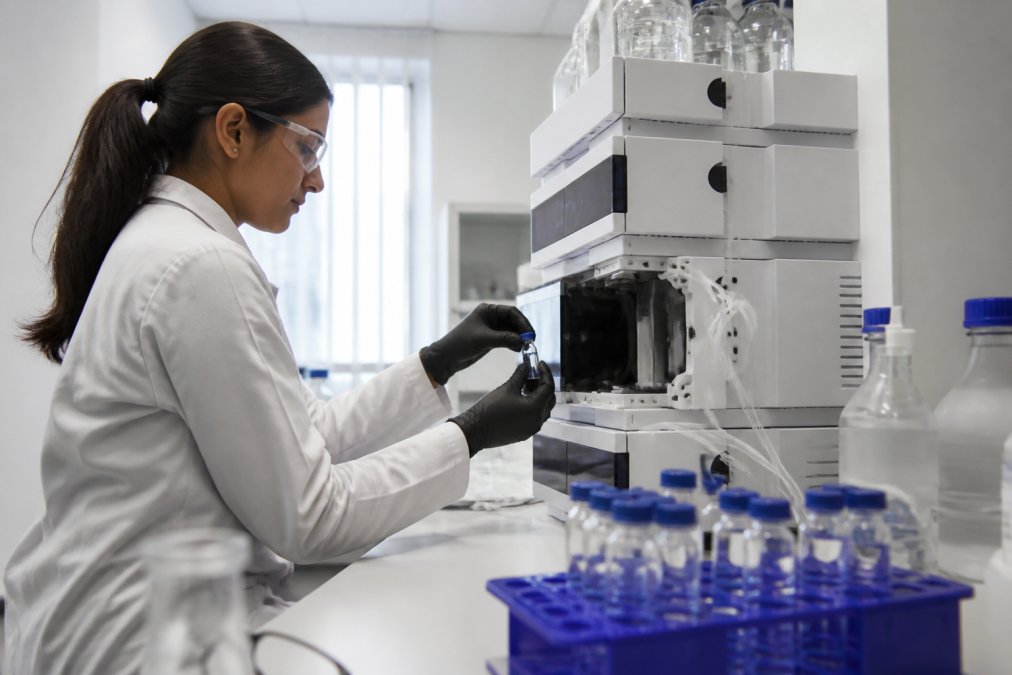
High-performance liquid chromatography (HPLC) separates intact peptide from fragments by retention time and gives you a purity percentage. Mass spectrometry (MS) confirms molecular weight and identifies the specific degradation product. Neither alone tells the full story.
What HPLC Actually Tells You in a Stability Study
Reverse-phase HPLC on a C18 column with a water/acetonitrile gradient and 0.1% trifluoroacetic acid is the workhorse method for peptide stability work. The output you care about is not the purity number on the report but the chromatogram itself: peak area of the intact peptide relative to total peak area, tracked across time points. A purity drop from 98% to 94% over eight hours is a stability signal only if the method resolves the degradation products from the parent peak. If your gradient runs too steep, fragments co-elute with the intact peptide and the loss disappears into the baseline.
Method parameters that change results between labs include gradient slope, column temperature, mobile-phase pH, and injection volume. Fix all four in your protocol and report them. A common pattern is a lab that validates a method on one column lot and then switches lots mid-study without re-running the system suitability check.
What Mass Spectrometry Adds
MS gives you the mass of the intact peptide and of each degradation product, which lets you assign a mechanism. A loss of 18 Da points to dehydration; a gain of 16 Da points to oxidation of methionine or tryptophan; a gain of 1 Da at asparagine points to deamidation. Electrospray ionization in positive mode with a quadrupole time-of-flight analyzer is the standard configuration for this work because it gives accurate mass on both the parent and the fragments in a single run.
MS alone gives you mass but not relative abundance without careful calibration. If you report “5% degraded” from MS peak heights without an internal standard, the number is not defensible. Use a stable-isotope-labeled analog of your peptide as an internal standard where possible, or calibrate against a dilution series of the intact peptide.
Designing an Orthogonal Panel
The point of orthogonality is that the two methods fail in different ways. A practical panel for peptide stability work is:
- Reverse-phase HPLC-UV for relative abundance of intact peptide versus fragments, with the chromatogram retained as raw data.
- LC-MS (ESI-QTOF) for mass confirmation and degradation-product identification.
- Size-exclusion chromatography (SEC) when aggregation is a suspected route, since reverse-phase conditions can dissociate aggregates and hide them.
- Capillary electrophoresis (CE) as a third separation principle when charge variants from deamidation matter to your question.
HPLC alone can miss co-eluting fragments with similar hydrophobicity. MS alone gives you mass but not relative abundance without careful calibration. SEC alone will not resolve backbone cleavage. Run at least two methods that separate by different principles, and report both chromatograms, not just the summary percentage.
Method Validation Before You Trust a Trend
Before you run a stability study, run a system suitability check on the method itself: resolution between the intact peak and the nearest degradation product, tailing factor, and injection precision across six replicates. If resolution is below 1.5, the method cannot support a stability claim regardless of how clean the chromatograms look. Ask for the raw chromatograms, not just a summary percentage.
Watch out: a method that passes system suitability on day zero can fail by day seven if the column degrades or the mobile phase evaporates; re-run the suitability check at every time point, not just the first.
How Accelerated Stability Testing Fits Into a Study Design
Accelerated stability testing is the practice of raising temperature, humidity, or light exposure to force degradation faster, then extrapolating back to real storage conditions. It belongs early in a study, not at the end. The logic is simple: if a peptide degrades 5% in two weeks at elevated temperature, you have a shelf-life signal in weeks instead of months. Use it to screen buffer candidates, then confirm the winner under normal conditions.
Stress Conditions Worth Running
Regulatory stability frameworks such as ICH Q1A(R2) define accelerated conditions for drug substances, which are often too aggressive for research-grade peptides. A more useful panel for laboratory research is:
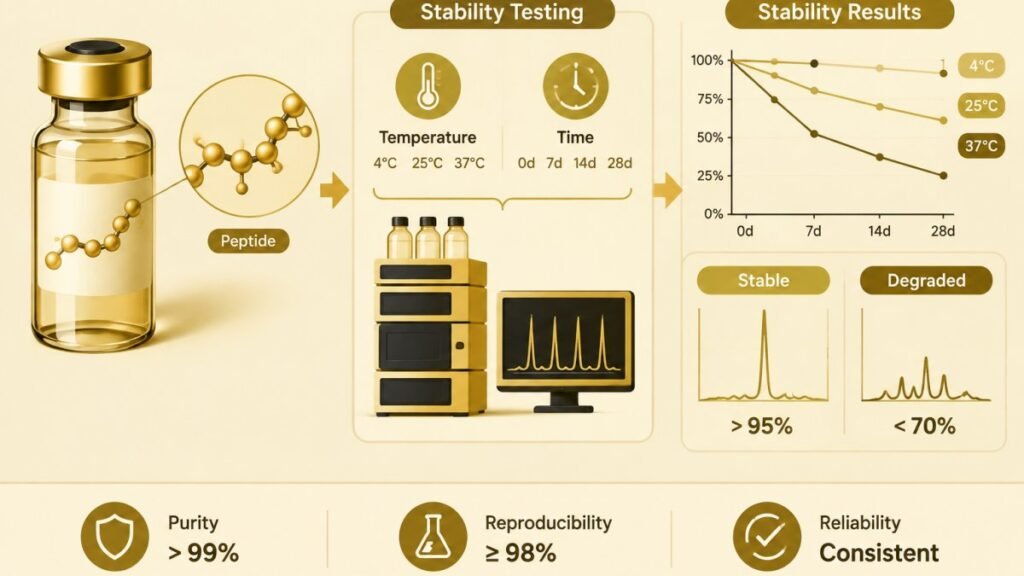
- Thermal stress: 25 degrees C, 37 degrees C, and 45 degrees C, each with a zero-hour control and at least three time points (for example 0, 7, 14, and 28 days).
- pH stress: a buffer series spanning pH 3, 5, 7, and 9 at fixed ionic strength, run at 37 degrees C, to map the hydrolysis and deamidation minima for your sequence.
- Oxidative stress: 0.1% to 3% hydrogen peroxide at 25 degrees C for 1 to 24 hours, which isolates methionine and cysteine oxidation from other routes.
- Photostability: exposure to a defined light source under a recognized guideline, with a dark control.
- Freeze-thaw stress: three to five cycles from -80 degrees C to room temperature, which is the condition most likely to reveal a handling problem before it shows up in your assay.
Run one stress variable at a time. Combining heat and light in a single arm makes the degradation route unassignable, and you will not know which control to change.
Extrapolation Limits
The common rule of thumb is that a 10 degrees C rise roughly doubles reaction rate, which is why accelerated data is often extrapolated with an Arrhenius model. That model holds for a single dominant degradation route with a known activation energy. It breaks down when the route changes with temperature, for example, when hydrolysis dominates at 45 degrees C but oxidation dominates at 25 degrees C. Extrapolating accelerated data past about 10 degrees C above the intended storage temperature produces numbers that look precise and mean little. Report accelerated results as a ranking of candidate formulations, not as a shelf-life claim, unless you have confirmed the same route under real-time conditions.
Statistical Validation of Stability Data
This is where most published stability studies are weakest, and where you can make your data defensible. A degradation trend should be monotonic across time points; a single dip that recovers is a handling artifact, not a stability finding. Fit a linear regression of intact-peptide percentage against time and report the slope with a 95% confidence interval. If the confidence interval on the slope includes zero, you have not demonstrated degradation, regardless of how the point estimates look.
Run triplicates at each time point and report the standard deviation. With three time points and single replicates, a 4% change is noise. A practical threshold many labs use is that a change must exceed three times the assay’s injection precision to be called a real loss. For a peer-reviewed figure, show the individual data points, the fitted line, and the confidence band, not just a bar chart of means.
A Workable Design Sequence
- Pick one stress variable at a time: thermal, pH, oxidative, or light.
- Run at least three time points plus a zero-hour control, in triplicate.
- Keep an unstressed reference sample at the recommended storage temperature, assayed alongside every stressed sample.
- Validate the analytical method’s system suitability at every time point.
- Fit the trend and report the slope with confidence intervals before drawing any shelf-life conclusion.
If you need your results to hold across runs and operators, our guide on ensuring reproducibility in peptide studies walks through the design details. Watch out: accelerated data collected without an unstressed reference cannot distinguish true degradation from assay drift, and reviewers will ask for that control.
Peptide Storage and Handling Guidelines for Reproducible Assays
Storage and handling cause more reproducibility failures than any analytical step. Sample handling errors, freeze-thaw cycles, and light exposure quietly change your starting material before the assay begins.
- Aliquot on day one, at working volume, so you never thaw a stock twice.
- Store lyophilized peptide dry and desiccated; reconstitute only what you need.
- Keep reconstituted stock at the recommended temperature and protect it from light.
- Record buffer compatibility for every vial, including pH and ionic strength.
- Avoid vigorous vortexing, which can drive aggregation.
Our peptide research safety and handling guide covers the practical side of this in more detail. Batch purity at the start of a study sets the ceiling on everything downstream, so log the lot number next to every result.
Third-Party Analytical Testing Services and What Their Reports Prove
Third-party analytical testing services verify identity, purity, and often mass confirmation on a batch you did not produce yourself. What their reports prove is narrower than most buyers assume.
A certificate of analysis typically confirms that the material in the tested vial matches the stated molecular weight and meets a stated purity threshold by HPLC. It does not prove your storage conditions, your assay design, or long-term stability. It proves the starting point.
When you read a report, check these four things:
- Whether the purity figure comes with the actual chromatogram
- Whether the method is named, not just the result
- Whether the lot number matches the vial in your hand
- Whether the lab is named and independent of the seller
Our article on why third-party peptide testing matters explains what each section of a report actually verifies. PepAlphatides batches undergo independent third-party testing, and each product carries its own certificate of analysis behind a secure QR code on the vial, so you can check the lot before you run anything.
Troubleshooting Assay Failures and Interpreting the Data
Most assay failures trace back to four causes, and only one of them is the peptide. Before you blame the compound, rule out the other three.
| Problem | Likely cause | Fix | Impact |
|---|---|---|---|
| Purity drops between time points | Repeated freeze-thaw | Single-use aliquots | Removes handling variance |
| Recovery below 80% at zero hour | Incomplete precipitation | Validate quench recovery first | Establishes true baseline |
| Extra peak at lower mass | Hydrolysis during incubation | Lower pH or shorten window | Isolates degradation route |
| Results shift between runs | Buffer lot or pH drift | Fix buffer recipe, measure pH | Restores reproducibility |
Statistical significance deserves a hard look too. With three time points and single replicates, a 4% change is noise. Run triplicates and report confidence intervals; a degradation trend should be monotonic across time points, not a single dip. If your data does not trend, you have a handling problem, not a stability finding.
Sourcing Compounds That Hold Up to Stability Testing
Sourcing is the variable researchers control least and should scrutinize most. A compound that arrives at 95% purity with no chromatogram will not survive an accelerated study, no matter how careful your protocol is.
Our sourcing criteria are designed around what stability work demands:
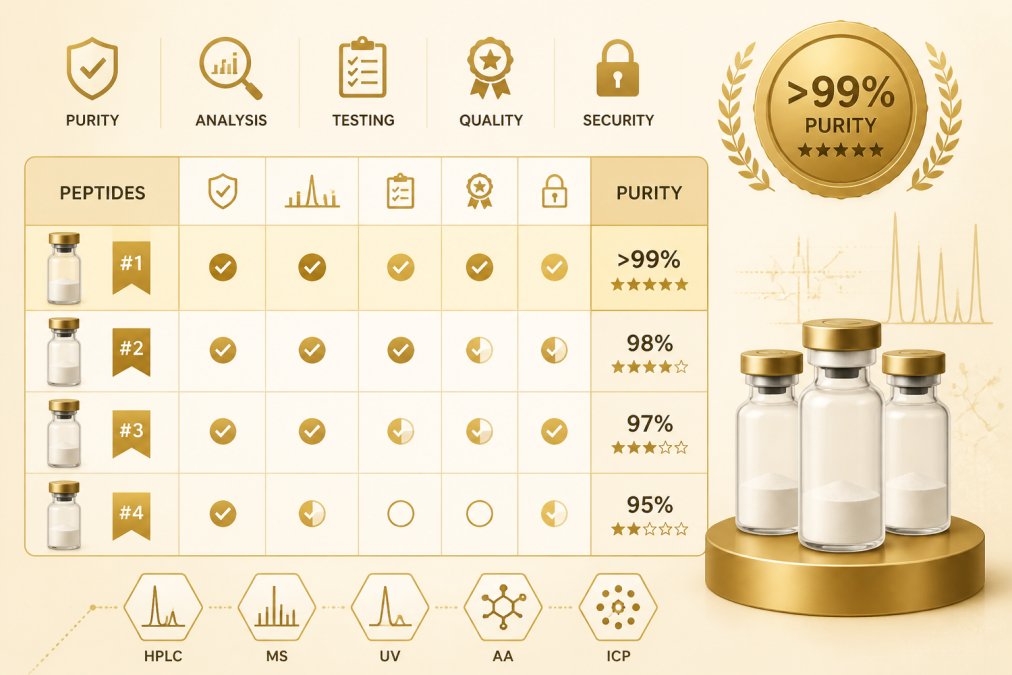
- Purity levels exceeding 99%, confirmed by independent third-party testing
- An individual certificate of analysis for every product, not a generic batch sheet
- Secure QR codes on vials linking to the specific analytical report
- Research-focused sourcing, so documentation matches lab use
If you are new to this, start with our 7 steps to choose high quality research peptides. It covers the questions worth asking before you buy. Pricing depends on quantity, dates, and delivery, so check the PepAlphatides website for current prices or a quote. Research members get a 10% discount, and orders over $250 ship free.
Reliable stability data starts with material you can trace. If your last assay gave you a result you could not reproduce, the vial is the first thing to check, not the protocol. PepAlphatides tests every batch through an independent lab, publishes purity above 99%, and links each vial’s QR code to its own certificate of analysis, so your baseline is documented before your first time point. Get started with PepAlphatides and run your next stability study on material you can actually verify.
Frequently Asked Questions
How long do peptides stay stable in the lab?
There is no single answer because stability depends on sequence, buffer, temperature, and concentration. Published peptide stability testing protocols differ in incubation, precipitation, and detection steps, which limits direct comparison between studies. In practice, run a time-course assay under your own storage conditions and detect degradation by LC-MS or HPLC at set intervals rather than assuming a shelf-life figure from another lab. Document temperature, pH, and buffer composition alongside every result so the data stays interpretable.
What are the ICH guidelines for stability testing, and do they apply to peptides?
ICH stability guidance (Q1A(R2) and related documents) sets out how to design formal stability studies: batch selection, storage conditions, testing frequency, and shelf-life assignment. Peptides fall under the biopharmaceutical umbrella, and proteolytic stability assessment is increasingly treated as a fundamental part of peptide characterization, per a 2021 review. The ICH framework gives you the structure, but peptide-specific degradation routes such as deamidation and hydrolysis mean you should add sequence-relevant assays rather than copying a small-molecule protocol wholesale.
Where can I get peptides lab tested, and what should a report include?
Independent third-party analytical testing services run the assays and issue a report you can attach to your records. Look for HPLC purity figures, mass spectrometry confirmation of molecular weight, and the specific method and conditions used. A certificate of analysis tied to a batch number is more useful than a generic purity claim, because it lets you match the report to the vial in hand. Ask whether the report covers the storage conditions you plan to use, since stability under client-specified conditions is what actually predicts performance in your study.
Why is proteolytic stability a critical concern for peptide research?
Proteolytic degradation cleaves the peptide backbone and can eliminate activity before your assay reads a result, so a compound that looks pure at the start may be largely gone by the detection step. Proteolytic stability assessment is an important component of peptide characterization. Control it by keeping samples cold, limiting freeze-thaw cycles, and using protease inhibitors where the assay allows. Run a parallel stability arm so degradation is measured rather than assumed, and report the incubation conditions with your findings.